 "MUSASHI66" (musashi66)
12/04/2018 at 21:02 • Filed to: None
 0
0
 8
8|
"MUSASHI66" (musashi66)
12/04/2018 at 21:02 • Filed to: None | 0
| 8 |
Today was cold-ish but sunny, so I decided to change the sway bar end links as they arrived from RockAuto . Driver side was broken, passenger side broke while I was removing it - they were pretty rotten. New pieces went on without a hitch - easy 30 minutes of work.
It was still sunny and not too cold, so I decided to tackle the rear shocks. I figure, 3 bolts per side and wheel removal - how hard can it be? Well, it turns out, very fucking hard.
I started on the drivers side, and decided to take the picture of the frame rust. Is this bad or no? I can’t put a screwdriver through the frame anywhere, but it is rusting and peeling in layers.
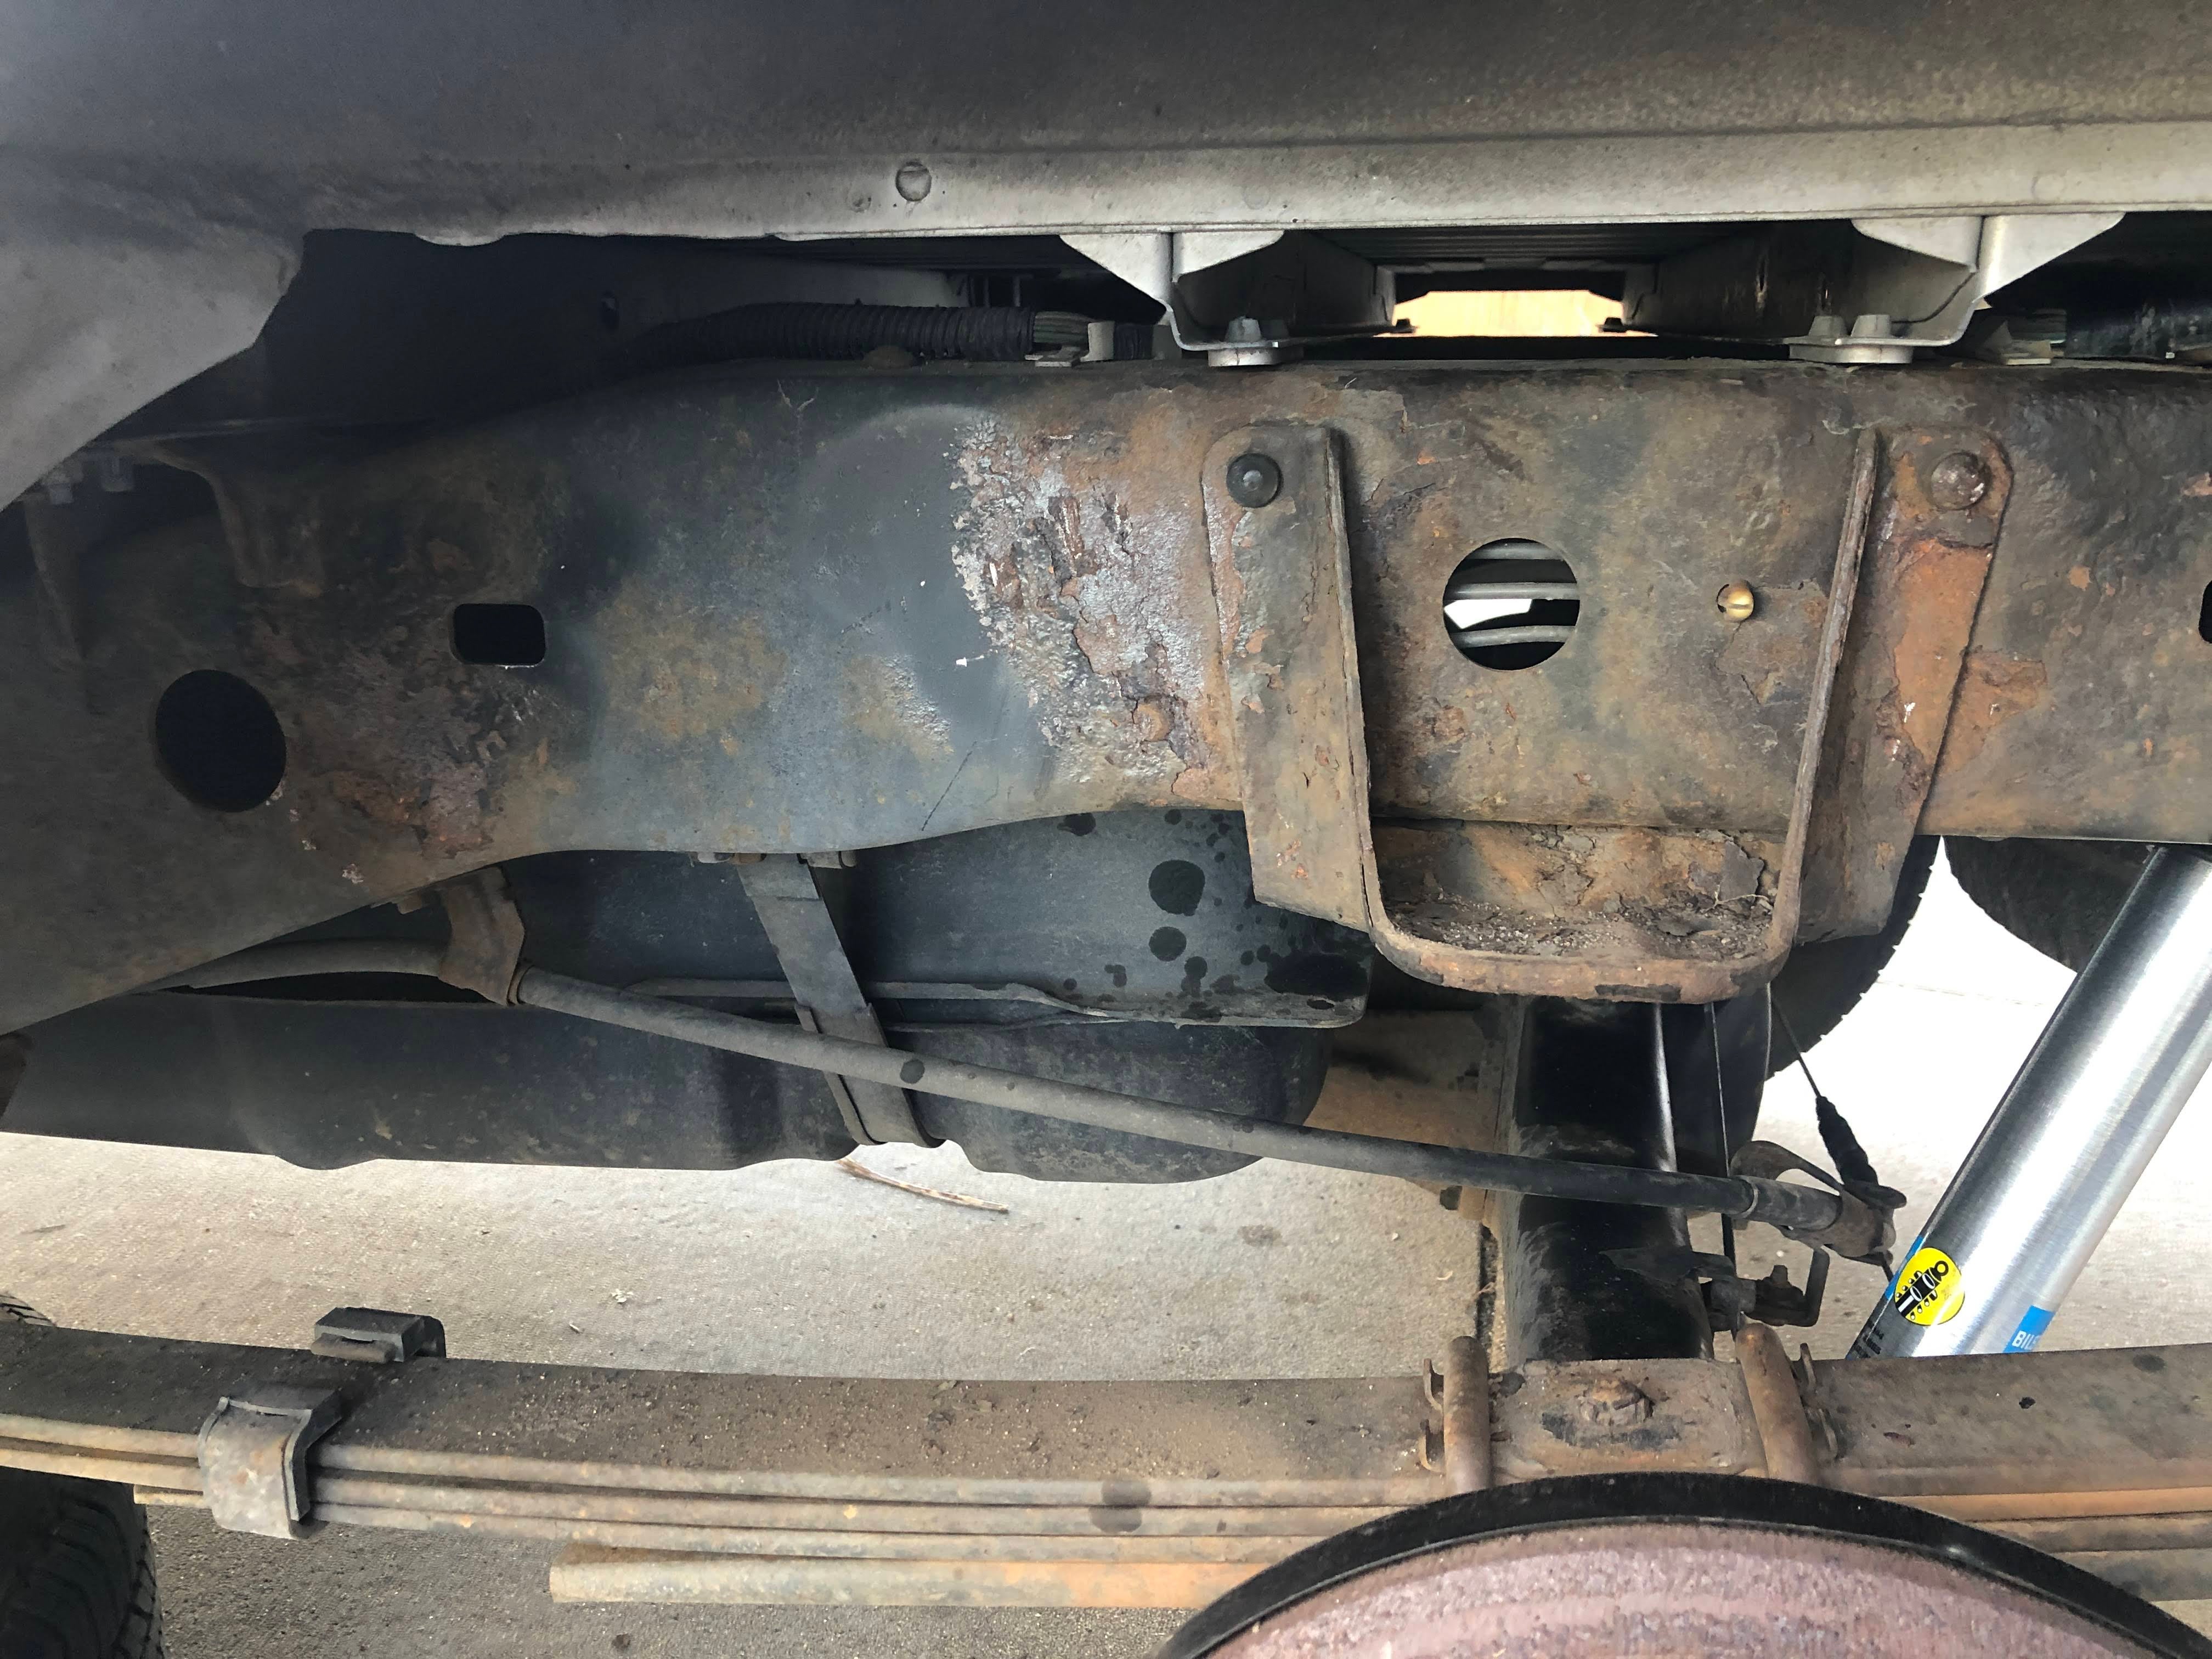
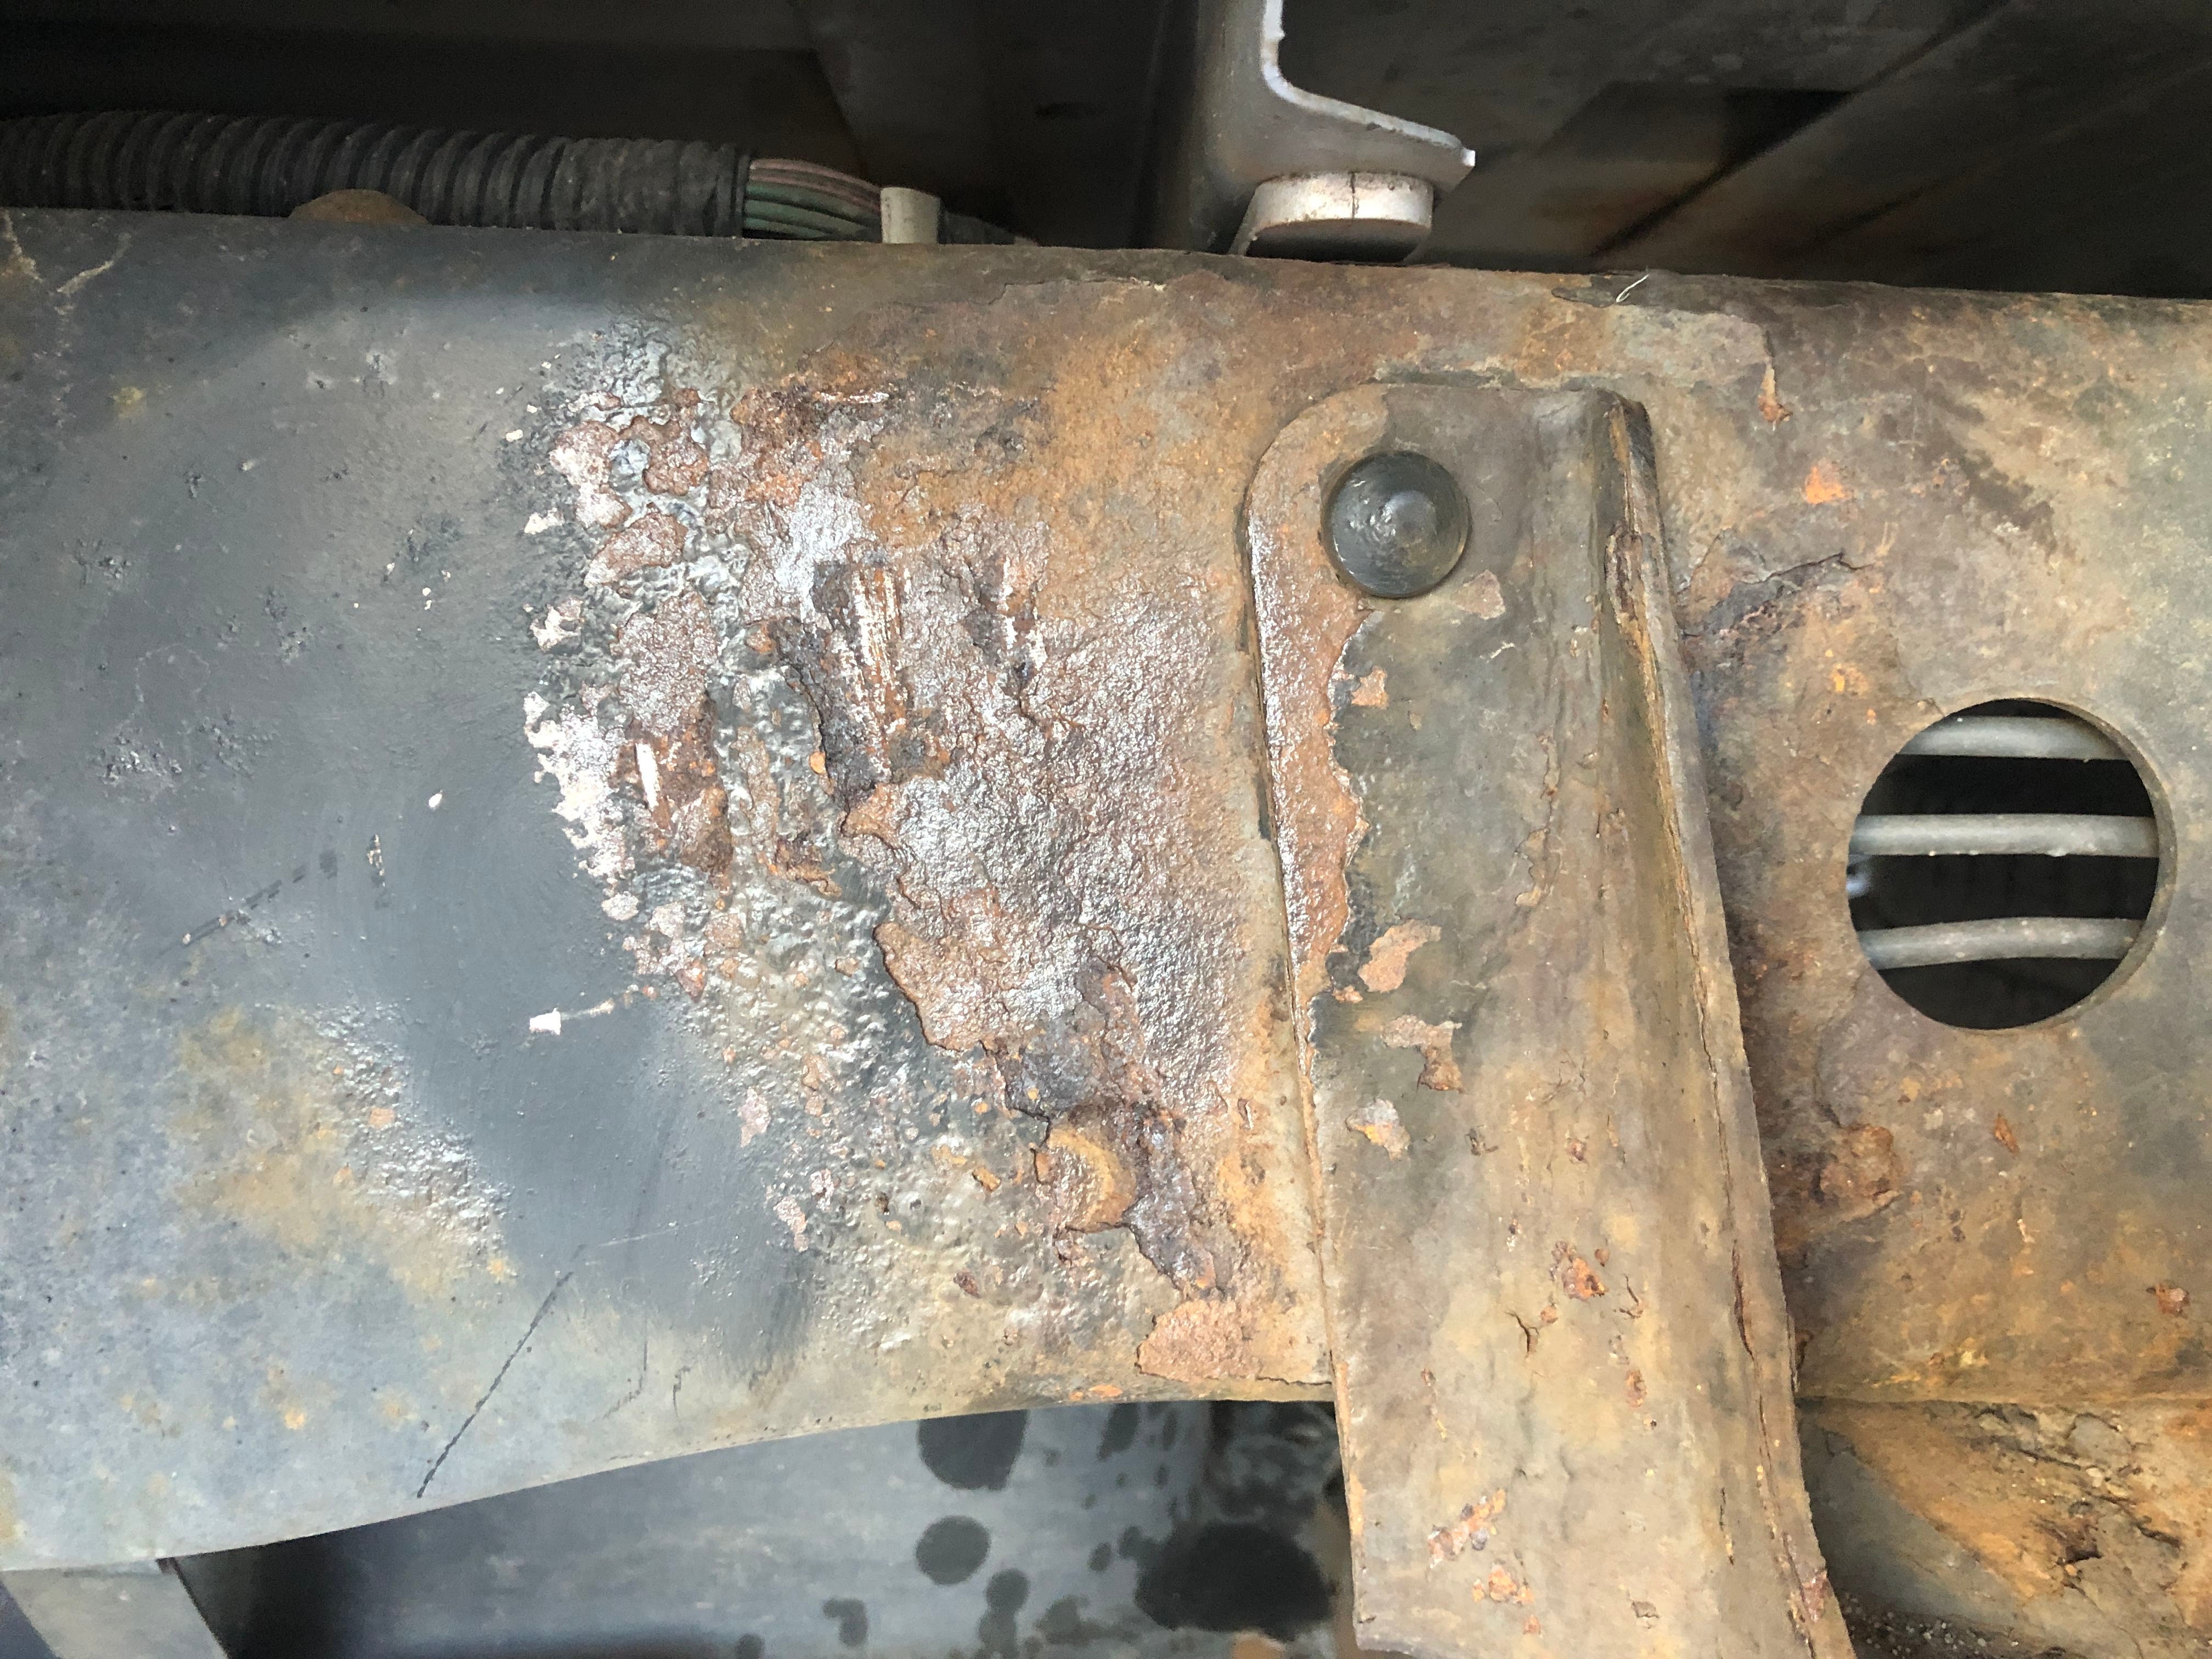
I mean, it is an 18 year old truck with 132k miles in Colorado, so I’m not shocked to see it there, but I don’t want to keep throwing money on it if it will break in two on me. Should I pull the bed next spring, do some scraping and protecting? Not sure if it would be worth it, but a coat of some sort of rust protection couldn’t hurt.
Anyway, rear shocks. The bottom of the shock is easily accessible, and it came off easily - one bolt and one nut. They were in great shape, I sprayed them with some PB Blaster anyway, and added some no-seize paste on the bolt. The top bolt however... thoroughly seized, and not in a location where one can put any leverage on it. No room for a socket - just a box wrench. To top it off , in order to remove it, you have to hold the top of the bolt with something to prevent it from spinning. It wouldn’t budge, so I grabbed my sawzall and chopped its head off. Well, that didn’t work either - the little bit of the bolt that was left was still holding the washer down real good. So, I went between the bushing and the washer, and few minutes later, it was off. Installation was pretty easy - Bilsteins provide a hole for an allen wrench on top to counter the spin, and I had the new shock on in minutes. Success!
On to the passenger side - same story, seized and not budging. I tried a different approach here - I tried holding the shock “collar” if you will in place and tried breaking the bolt with the box wrench and a long pipe, no luck. If I had another person, maybe I could had made it work, but I was alone today. So, I decided to cut the head. I grabbed my sawzall and...it wouldn’t reach. Passenger shock is mounted in such way that it is somehow further in than the driver side. My angle grinder wouldn’t fit. My dremel wouldn’t fit. My hand saw would. Well, Toyota made these shocks with titanium bolts and nuts, reinforced with kryptonite and industrial diamonds. I am so freaking sore, because it took forever to cut the bolt. Yet again, cutting it didn’t produce the result I wanted - little piece of the nut still clinged on to the washer and wouldn’t budge. Oh yeah, the washers are made with their own little force field as well - no amount of trying to pry them worked. So I managed to get the angle right and get my hand saw between the bushing and the bottom of the washer. I would do some cutting, then some heat treatment with a propane burner, then some prying with long screwdrivers, then some hammering with a metal chisel. Rinse and repeat multiple times. I probably spent 2 hours on the passenger side. It finally popped of with two screwdrivers on both side of the bolt, pushing on the washer from under.
By then, it was after 6pm, pitch black and in 30's - freezing. I bolted the new shock in place, put the tire on, cleaned my tools, cleaned the trash, and took a quick spin around the block to see if anything is rattling or squeaking .
No noises, great success. Every time I accomplish something, I think of my self as !!!error: Indecipherable SUB-paragraph formatting!!! . One super sore god of hellfire.
On the positive note, I now have two more stickers for my garage cabinet!

 MM54
> MUSASHI66
MM54
> MUSASHI66
12/04/2018 at 21:42 |
|
That rust doesn’t look too bad, but an oil spray before winter can’t hurt.
As for the shocks, that sounds about right. It’s standard procedure on pre-’03 crown vics (like my ‘02) to buy a 12" sawzall blade when you get the parts, just like yours the top has to be held in place and wrenched on without any room to wrench on it. Welcome to “we assembled this before the body was there”
|
MUSASHI66
> MM54
12/04/2018 at 21:52 |
|
Wait, they sell longer sawzall blades?? Well fuck me sideways...
Tell me more about that oil spray please. Is that something I’d do my self or have a shop do it? Should I remove as much rust as possible before the spray? Should I do this with bed on or off? Thanks!
|
MM54
> MUSASHI66
12/04/2018 at 23:01 |
|
Handy to keep both long and short blades on-hand :)
For the oil, you can either find a shop to do it or do it yourself with something along the lines of fluid film. I’d do it with the bed on for sure so you can also spray the bed (to prevent it rusting, too). Wire brush any loose/flakey rust beforehand and you should be good to go.
|
MUSASHI66
> MM54
12/04/2018 at 23:03 |
|
Sweet, researching right now!
 IJustWantMyZBack
> MUSASHI66
IJustWantMyZBack
> MUSASHI66
12/04/2018 at 23:18 |
|
Gl ad you got them changed. Por15 may be your friend. I can’t remember fighting the factory bolts as much as you did but TX truck vs CO I guess.
|
MUSASHI66
> IJustWantMyZBack
12/05/2018 at 00:00 |
|
I’m about to go crazy at Lowe’s on angle grinder wire wheels and I’m researching options. Por15 is my friend - my pricey friend. There a few more options, we’ll see which one wins.
 xsnowpig
> MUSASHI66
xsnowpig
> MUSASHI66
12/05/2018 at 07:59 |
|
yikes, that sounds like a whole lot of no fun. Colorado wrenching anywhere other than a heated shop always has that potential. I would definitely take that to a pressure washer and get that last bit of mag chloride off before a topcoat of Por15, Eastwood Rust Encapsulator, or an oil film of some sort.
|
MUSASHI66
> xsnowpig
12/05/2018 at 09:30 |
|
Yeah, fun wasn’t a word I’d use to describe any of it.
Is there a rust solution that’s not a once a year kind of deal, that’s not too expensive And doesn’t require hours of prep work? I’ve been thinking of angle grinder + wire wheel + pot-15 in spray can or Chasis Saver with a brush as it requires less prep. I just don’t want to do this every year.